Overview
Knowing how to plant grass seed properly is the first step to achieving a lush, green lawn that enhances the beauty of your outdoor space. Dreaming of a soft, green lawn for your home? A lovely space for relaxing or playing? Learning how to plant grass seed the right way is your most important first step. While it might seem like a big task, it’s actually simpler than many people think. This guide will lead you through each part in a clear, friendly way. We’ll cover all you need to know, from understanding your soil to choosing the best seed, because a good start is essential when learning how to plant grass seed.
Your Lawn’s Foundation: Why Good Soil Really Matters
Before you even buy grass seed, let’s talk about your soil. Good soil is super important when you plan for how to plant grass seed. Think of soil as the home where your grass roots will live. This home must provide everything grass needs: air for roots to breathe, water to drink, and nutrients for food. If the soil isn’t right, your grass will struggle.
Common Soil Issues Affecting Grass
Many gardens don’t start with perfect soil. Clay soil is heavy and can pack down, making it hard for water to drain and for roots to get air. Sandy soil is the opposite; water and nutrients can run through it too fast. Soil might also be compacted from foot traffic, or it might lack good organic matter. These issues prevent the roots from receiving the necessary resources they require. Fixing soil issues first is key for a healthy lawn.
Getting Your Soil Ready: Building a Welcoming Home
Making your soil a great place for grass seed involves several important actions. This careful preparation is a very big part of understanding how to plant grass seed for the best outcome. Be sure to follow these steps, as they have a significant impact.
Step 1: A Thorough Clean-Up of the Area
First, clear the ground completely where you want your new lawn. This provides a fresh foundation for planting.
Remove Old Growth and Weeds: Take out any old grass, especially if it’s patchy or full of weeds. It’s very important to remove all weeds, getting their entire root system. If roots are left behind, weeds can grow back and compete with your new grass seedlings.
- Clearing Methods: For small areas, a rake and some pulling might be enough. For larger areas with old turf, renting a sod cutter can be helpful. Some use herbicides, but if you do, read the label carefully and wait the recommended time before planting.
- Look Deeper for Debris: Check the top few inches of soil for hidden stones, old construction debris, or thick roots. These can stop grass roots from growing well later.
Step 2: Fixing Drainage and Grading Issues
Grass needs water, but too much sitting water is harmful. Proper drainage is essential.
- Spotting Drainage Problems: Look at your yard after a heavy rain. Do puddles stay for many hours? That’s a sign of poor drainage.
- Improving Drainage: Mixing organic matter like compost into your soil helps. Ensure the area has a gentle slope so water flows away from your house. You might need good topsoil to fill low spots and help create this slope.
Step 3: Loosening the Soil – The Importance of Tilling
Most soil benefits from being loosened up before planting. This is often called tilling.
- Why Till? Tilling breaks up hard, packed soil. This process creates pathways for air and water, essential for root health, while also facilitating the growth of new roots deeper into the soil. Try to loosen the soil to a depth of 4 to 6 inches.
- How to Till: For small spots, a garden fork works. For larger lawns, renting a power tiller is a good idea. It saves a lot of effort. Tilling can bring weed seeds to the surface, so be prepared to manage new weeds.
- The Value of a Soil Test: Before starting tilling, think about conducting a soil test. You can use a testing kit or send a sample to a laboratory for analysis. A test shows your soil’s pH (grass likes 6.0-7.5) and nutrient levels. It will tell you if you need to add things like lime (to make soil less acidic) or specific fertilizers.
Step 4: Adding Goodness (Amendments) and Leveling
Once soil is loosened, improve it further and make it smooth.
- Choosing Amendments: Organic matter is great for soil. Well-rotted compost is one of the best choices. It helps both clay and sandy soils. Aged animal manures or leaf mold are also good. Apply a layer with a thickness of 2 to 4 inches.
- Mixing It In: Carefully mix these amendments into the top 4 to 6 inches of soil using a tiller or a rake.
- Leveling for a Smooth Surface: A level seedbed looks better and is easier to mow. It also helps water spread evenly. Utilize either a garden rake or a landscape rake for the task. For large areas, dragging a long, straight board can help level the soil. Remove any small stones or clumps.
Step 5: Firming the Soil Gently
This step is often missed but is very important for good seed germination.
- Why Firm the Soil? Loose soil can let seeds wash away or settle unevenly, burying some seeds too deep. Firming the soil slightly prevents this. This also guarantees strong contact between the seed and soil, which is crucial for effective moisture absorption.
- How to Firm: You don’t want to pack soil hard again. Just remove large air pockets. For small areas, walk gently over the surface. For larger spaces, use a lawn roller filled about one-third with water. Ensure your footprints sink no deeper than half an inch into the soil.
- Final Touch: After rolling, lightly rake the very top surface to create tiny grooves. This helps catch seeds. Water lightly for a few days before seeding to let soil settle.
What is the ideal time to plant grass seed?
Planting at the right time can significantly enhance your chances of success. Picking the right season is a key part of knowing how to plant grass seed.
- Autumn – Often Ideal: For cool-season grasses (like fescue, bluegrass, ryegrass), early autumn is usually best. The soil is warm, helping seeds sprout quickly. Cooler air is less stressful for new seedlings. There’s often more rain, and fewer weeds are actively growing. This gives grass two cool seasons (fall and spring) to establish before summer heat.
- Spring – A Good Second Choice: If you miss fall, spring is next best. Wait until frost danger has passed and soil is warmer (above 10°C/50°F for cool-season grasses). The main challenge is that summer heat and weeds will arrive soon. You’ll need to water carefully.
- Avoid Mid-Summer: Planting in hot summer is usually not wise. Soil dries too fast, making it hard for seeds to stay moist enough to sprout.
How to Plant Grass Seed: The Actual Seeding Steps
Your soil is prepared, and you’ve chosen an optimal time. Now for the main event! Following these steps carefully is crucial when you how to plant grass seed.
1. Pick Your Grass Seed Carefully
Choosing the right seed type for your yard is crucial.
- Cool-Season vs. Warm-Season: Cool-season grasses (Kentucky Bluegrass, Fescues, Perennial Ryegrass) do best in areas with cold winters and distinct seasons. Warm-season grasses (Bermuda, Zoysia, St. Augustine) love heat and thrive in summer, often going dormant (brown) in winter in cooler areas. Choose based on your local climate.
- Read the Seed Label: Look for grass types and named varieties (often better). Check purity (high is good), germination rate (high is good), and weed seed content (should be very low, ideally 0%). Purchase fresh seeds that have a valid sell-by date.
- Sun or Shade? If your yard is mostly sunny, pick a sun-loving mix. For shady areas, choose a “shade mix” with shade-tolerant grasses like fine fescues.
2. How Much Seed to Use – Getting the Rate Right
Using the correct seed amount is important.
- Why It Matters: Too little seed makes a thin, patchy lawn open to weeds. Too much seed causes overcrowding; seedlings compete and grow weak, risking disease.
- Check the Bag: The seed bag gives a recommended sowing rate (e.g., pounds per 1,000 sq ft or grams per sq meter). Follow this.
- The Two-Pass Method: For even coverage, divide your seed in half. Spread one half walking one way (e.g., north-south). Spread the other half walking across that path (e.g., east-west). This helps avoid missed spots.
3. Spreading the Seed Evenly
How you spread seed affects your lawn’s look.
- Spreaders: For most lawns, a broadcast (rotary) spreader or a drop spreader is best. Broadcast spreaders cover large areas quickly. Drop spreaders provide precise coverage along edges but require careful overlap between passes for even distribution.
- Hand Spreading: For very small patches, you can spread seed by hand. Try for an even scatter.
- Calm Day: Seed on a calm day if possible. Wind can easily scatter light grass seeds.
4. Helping the Seed Make Good Contact with the Soil
Seeds must touch moist soil to germinate.
- Why Contact is Vital: Seeds take in moisture from the soil to begin sprouting. If they just sit on top, they can dry out or be eaten by birds.
- Gentle Raking: After spreading seed, very gently rake the area. You just want to lightly mix seed into the very top of the soil, about 1/8 to 1/4 inch deep.
- Rolling Again (Optional): Lightly rolling with a lawn roller (about 1/3 full) after raking gently presses seed into the soil, ensuring good contact.
- Light Topdressing (Optional): A very thin layer (1/4 inch max) of fine compost or peat moss can help keep seeds moist, especially in sunny spots. Don’t apply too thickly.
Watering Your New Grass Seed: The Most Critical Care Step
Proper watering is absolutely key after planting grass seed.
- Keep Top Soil Moist: From planting until grass is growing well, the top inch of soil must stay consistently moist, like a wrung-out sponge.
- How to Water: Use a sprinkler with a fine, gentle spray. Hard sprays can wash seeds away.
- Frequent, Light Watering: For the first 1-2 weeks, water lightly 2-4 times a day for 5-15 minutes. Don’t let the seedbed dry out completely.
- Check Moisture: Carefully press your finger into the soil. The top inch should feel damp.
- Avoid Overwatering: Don’t make a swamp. Too much water causes rot and disease. No standing water.
- Adjust for Weather: Water less on cool, cloudy days; more on hot, sunny, or windy days.
- Transition Watering: Once grass is an inch tall, water less often but for longer each time. This encourages deep roots.
- Best Time to Water: The optimal time to water is early in the morning. It reduces evaporation and lets leaves dry during the day, preventing disease.
Feeding Your New Grass
New grass needs food to grow strong. Understanding this is also part of learning how to plant grass seed for long-term health.
- Starter Fertilizer: Apply a “starter” fertilizer immediately after planting. These are high in phosphorus, vital for root growth. Follow label directions.
- Don’t Use Regular Fertilizer Yet: Avoid high-nitrogen lawn food on new seedlings; it can burn them.
- How Long It Lasts: Starter fertilizer usually feeds for 4-6 weeks. Once you’ve mowed a few times, you can transition to a regular lawn fertilization routine.
- Caring for Your New Lawn After Planting Seed: The journey doesn’t end when the seeds sprout in the first few months. Proper care after planting grass seed is essential for a long-lasting, healthy lawn.
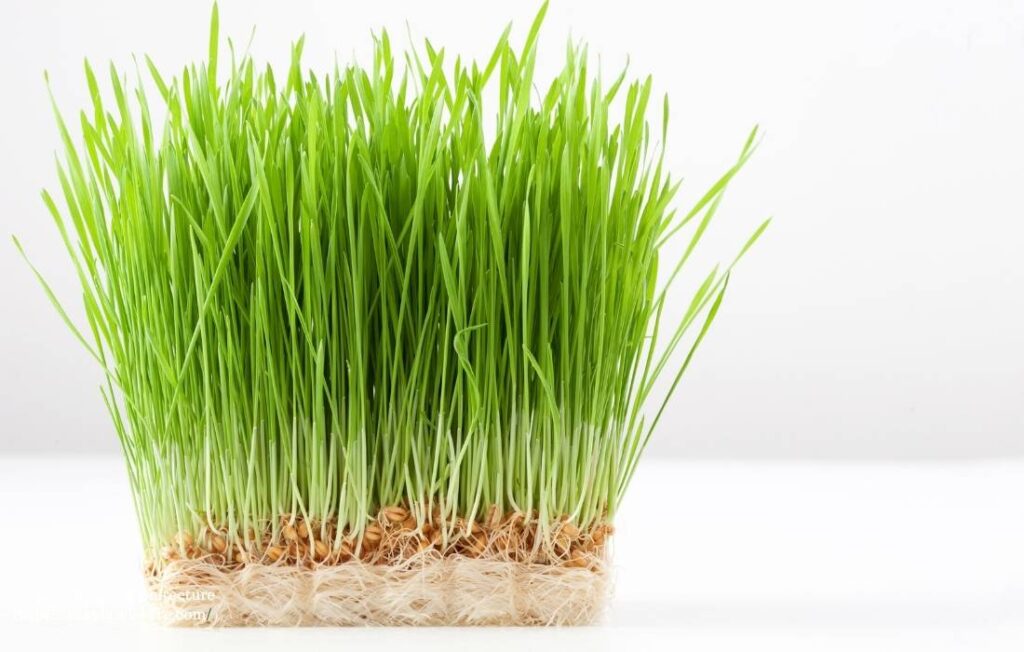
The All-Important First Mowing (and Beyond)
That first haircut is a milestone!
- When to Mow First: Wait until most new grass is 3 to 4 inches tall. Mowing prematurely can strain or dislodge young seedlings.
- Sharp Blades are Essential: Sharp blades cut cleanly. Dull blades tear young grass, stressing it and inviting disease.
- The One-Third Rule: Avoid cutting more than one-third of the grass blade’s total height in a single mowing session. Cutting too much shocks the grass.
- Bag Clippings Initially: For the first few mows, it’s good to bag clippings. This stops them from smothering new seedlings. Later on, you can often use mulch mowing if the clippings are small enough.
- Mowing Frequency: You might mow new grass more often at first (e.g., every 5-7 days) to follow the one-third rule.
- Mowing Height: Most cool-season grasses, such as Fescue and Bluegrass, thrive when mowed at a height of 2.5 to 3.5 inches. Many warm-season grasses can be mowed shorter. Maintaining the correct height encourages strong root growth and helps suppress weeds by crowding them out.
Dealing With Weeds in Your Tender New Lawn
Weeds will appear; it’s normal.
- Patience and Hand-Pulling: Your first defense is to gently hand-pull weeds when soil is moist. Be careful not to disturb new grass.
- Caution with Herbicides: Most weed killers harm young grass. Wait until your lawn has been mowed at least 3-4 times before even considering herbicides.
- Choose Safe Products: If you must use one, select a product specifically labeled safe for new lawns or your grass type. Always read and adhere to all label instructions carefully.
- Best Weed Defense: A thick, healthy lawn is the best long-term weed prevention. Good preparation and care help grass outcompete weeds.
Keep Foot Traffic to a Minimum – Let It Get Strong!
This may be challenging, but it is extremely important.
- Why It Matters: Young grass has delicate roots. Heavy foot traffic can crush seedlings, uproot them, or compact the soil.
- How Long to Wait: Try to keep people and pets off the new grass for at least 4-6 weeks, or until after a few mows and it looks well-established. The longer you protect it initially, the better.
Troubleshooting Some Common Problems with New Lawns
Even when you carefully follow all advice on how to plant grass seed, some issues can still pop up.
- Patchy Germination: Could be due to uneven seed or water distribution, poor seed-to-soil contact, or soil issues in those spots. You might need to gently rake and reseed any bare patches, ensuring they stay moist.
- Yellowing Grass: Can be caused by nutrient deficiency, over/under watering, or disease. Check watering first. A very light feeding of starter fertilizer might help if nutrients are low.
- Moss: Usually indicates shade, compacted soil, too much moisture, or low soil pH. Addressing these underlying issues is key.
- Fungal Diseases (e.g., Damping Off): Seedlings rot at the soil line. Often due to overwatering or seeds planted too densely. Ensure good drainage and don’t overwater.
Your Beautiful New Lawn: A Rewarding Achievement
Learning how to plant grass seed and seeing it through is a wonderful skill. It takes time and patience, especially in preparing the soil and caring for new seedlings. But the satisfaction of watching tiny seeds grow into a lush, green carpet is immense. This new lawn will enhance your home and provide a great space for enjoyment. By following these steps, you’re well on your way to achieving a healthy and thriving lawn. Happy planting!